by Michael Satterfield - 11/18/2024
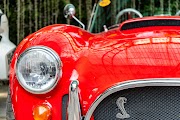
Back in October, I shared images of our fresh Meyers Manxter 2+2 being hoisted out of a truck and delivered to our headquarters in Groesbeck, Texas. This fresh kit would be the basis of our expedition vehicle for next year's Flag Expedition with The Explorers Club. But while it is easy to become enamored with the truckload of brand-new shiny parts, building one of these kits from scratch in about two months is a monumental task.
The first part of the journey was finding a suitable donor. I looked to see if I could find a solid running and driving VW Beetle, but as I was on looking, the prospect of taking apart a nice Beetle seemed like a bad idea since we were going for an off-road vehicle anyway; why not start with a Baja Bug. While there were dozens of them on Facebook Marketplace, there weren't many that were nearby, few in decent condition, and even less with running drivetrain. Eventually, I found one that looked solid, had already been lifted, had aggressive off-road tires, and had a solid drivetrain. So we loaded up the Nissan Frontier, picked up a U-Haul, and headed off to Killeen, Texas, to purchase a rolling 1970 pan with a title and drivetrain.

The pan was originally under a Baja bug so it already had a slight lift, looked to be rust free, and was ready to get cleaned up and ready for the new Manxter body. The pan fits perfectly through the doors into the old dry goods store, so now we have a body and a chassis, and we just need to put it all together—or so we thought.
The pan was hiding severe rust; it needed both floor pans, Nepolian's hat, and a new head mount. All of these had to be ordered from
J Bugs ASAP so we could keep on schedule. We disassembled the entire pan, got it on stands, and waited for FedEx to bring our new sheet via rural delivery. In around 10 days, we had a complete pan ready to go back together, but before we welded everything up, we decided a test fit of the body was in order.
Body test fit done, we got back to welding and, in a few days, were ready to start assembling the body, with just a few weeks to go before SEMA. In the meantime we got to painting the cage, rood rack, and the side impact bars as well as other brackets we needed to mount the body.
At this point, we didn't think we would receive the fiberglass roof panel in time, so we had just planned to mount the roof basket to the cage directly. We went with an off-white, Rust-Oleum Heirloom White, which matched closely to the wheels and the flag color that Sean Star would be painting on the car's hood. Overall, it was a lot of prep work on the bare metal and just the old school rattle can method of lots of light, thin coats to build a nice, even finish. A light sanding and some clear coat came out great. We had planned on having it painted by a shop, but no one could get us in and out in time for the show.
Pan back in the building, and we made short work of installing the side intrusan bars hidden under the fenders and outer bodywork. The bars bolt to the front axle beam, and the rear frame support comes with the kit. While one of us was working on getting the chassis prepped for the body, the others would finish the brakes, engine install, and other projects.
The main body is just one piece. We went ahead and premounted tail lamps, rear airbox cover, and other pieces while waiting for the pan to get finished. Once the pan was prepped, two of us picked up the body and simply lowered it on the pan, positioning it between the side intrusion bars. It is key that the side intrusion bars and even the rear body mount remain loose so you can wiggle and tweak the body down into the right position.
Next, we had to drop in the cage and start the challenging process of lining up everything from the floor holes to the side intrusion bars, which, not surprisingly, most a close, but all needed a little tweaking and pushing, leverage, and pulling to get locked into place. Once the bolts were all in on the cage and floor, we could go around and tighten everything up. It was really starting to look like a Meyers Manxter.
In the next installment, we will share the process of fitting the rest of the bodywork, the roof panel, exhaust, and bumpers.


_websize.jpg)


